After many years working with Japanese and pan-Asian kitchens—from Tokyo’s electric izakayas to California’s minimalist ramen bars—there’s one humble dish I’ve never seen lose relevance or emotional power: Chicken Katsu.
This article doesn’t just repeat how to fry chicken—it unpacks why the Japanese technique produces unmatched texture, how global kitchens have evolved it, and how you can replicate professional-level chicken katsu at home without deep-fryer drama.
Let’s pull back the stainless-steel curtain.
What Is Chicken Katsu? Everything You Need to Know About This Japanese Classic
Chicken Katsu (チキンカツ) is Japan’s adaptation of Western cutlets—specifically the European schnitzel—translated through washoku (Japanese culinary philosophy) filters of balance, clarity, and precision.
In Japanese, katsu is shorthand for katsuretsu, meaning cutlet. It’s traditionally deep-fried, breaded with panko (coarse Japanese breadcrumbs) rather than compact flour crumbs, resulting in a lighter, airier crunch that feels like biting into toasted snowflakes.
By the late 19th century, when Western influence shaped “yoshoku” (Western-style Japanese food), katsu found its way into home kitchens, school cafeterias, and restaurants. Originally made with pork (tonkatsu), the chicken katsu variant rose later for lighter fare and broader appeal.
Today, it sits everywhere—from convenience store sandwiches to Michelin kitchens pairing it with truffle salt. It’s one of those rare dishes that thrive equally in bento boxes and twelve-course omakase menus.
The DNA of Great Chicken Katsu
At its core, chicken katsu offers three pleasures simultaneously:
- Auditory Satisfaction: That crisp crackle when knife or chopsticks strike surface.
- Textural Duality: Crunch yields instantly to juicy tenderness—never grease or dryness.
- Flavor Architecture: Subtle chicken base, amplified by umami-forward sauces and sides (usually rice, shredded cabbage, and miso soup).
Every katsu, whether homemade or restaurant served, rises and falls by the integrity of those three pillars.
Chicken Katsu Explained: History, Ingredients, and Cooking Tips
From Luxury to Lunch Counter
The earliest tonkatsu restaurants—predecessors of chicken katsu—appeared in Tokyo’s Ginza district in the early 1900s. They served thick-cut pork loins inspired by French côtelette. But Japanese kitchens refined the method—switching to vegetable oil, using chopstick-friendly portions, and offering rice and miso alongside.
By the 1970s, as lean proteins gained favor and international tourists poured into Japan, chicken katsu entered center stage. It’s friendlier to diners wary of pork, easier to digest, and perfectly suited to the pairing versatility that defines modern Asian dining: it can sit over curry, inside a sandwich, atop ramen, or as the star of a rice bowl.
Critical Ingredients and Why They Matter
| Ingredient | Function | Insider Tip |
|---|---|---|
| Chicken Cutlet (Breast or Thigh) | Protein base | Thigh = juicier, softer bite. Breast = clean and lean. Many chefs combine both for texture complexity. |
| Flour | Initial binder for batter adhesion | Season flour lightly with salt before coating to embed salt evenly. |
| Egg Wash | Glue for breadcrumbs | Beat with 1 tbsp cold water; prevents excessive film buildup. |
| Panko Breadcrumbs | Creates micro-air pockets | Choose Japanese-style panko (larger crumb) rather than fine Western crumbs. Toast lightly for added depth. |
| Neutral Oil | Frying medium | Canola, soybean, or rice bran oil minimize flavor contamination. |
| Salt + Pepper | Pre-seasoning | Always season chicken before flouring. Salt inside helps moisture retention through osmosis reversal. |
Pro’s Note: Never compact the panko. Treat breading like snowfall—loose coverage creates that signature “porous crisp” texture.
Everything You Need to Know About Authentic Chicken Katsu
Professional chefs obsess over three sensory checkpoints when evaluating katsu: visual, tactile, and acoustic.
- Visual: Color should be golden—somewhere between 160–170°C frying temperature. Too pale = under-fried; too dark = bitter crust oils.
- Tactile: Crust should remain upright when plating—flaccid texture indicates soggy crumb saturation.
- Acoustic: Sharp, light crackle when cut signals correct moisture ratio (oil expelled from crumb cavities sounds higher-pitched when crisp).
I once trained a kitchen team to literally listen to batches as they emerged from fryers; the right crackle became our timer. It’s oddly meditative—and eerily reliable.
Choosing Between Chicken Breast and Thigh
This debate divides chefs worldwide.
- Breast: preferred for lighter, cleaner-taste restaurants, holds sauce well, but risks dryness.
- Thigh: higher collagen, juicier, slightly fattier—favored by izakayas and culinary purists in Osaka and Kyoto.
My experience? Use thigh when serving stand-alone katsu. Choose breast when layering in curry, sandwiches, or ramen where extra fat overwhelms broth or sauce balance.
Panko: The Unsung Hero
Panko isn’t just breadcrumbs—it’s electro-baked crust physics. Industrially, panko bread is baked with electric current rather than heat coils, generating a crustless, ultra-porous structure. When ground, it creates jagged flakes with 3–5 times more surface area than regular breadcrumbs, meaning more contact points for browning and crunch.
In short: panko = musical crispness. It traps steam, releases at bite pressure, and resets taste buds between mouthfuls.
Chicken Katsu: The Perfect Blend of Crunchy Coating and Tender Meat
Let’s explain why that mix feels irresistible.
Chicken katsu triggers multi-sensory synchronization: temperature differential (hot crust vs. moist core), texture contrast, and umami layering through Maillard reaction. Each factor magnifies appetite at a neurological level.
Most diners describe it as “addictive crunch.” In food science terms, the dry noise frequency of the crust signals freshness to our brain before the taste even registers. That’s why even soggy reheated katsu never fully satisfies.
So the real secret isn’t the recipe—it’s timing between fryer and fork. Legendary Tokyo katsu-ya chefs serve chicken within 90 seconds of draining, no exceptions.
How to Make Chicken Katsu at Home (Step-by-Step Recipe)
A method straight from my professional kitchen—but scaled for home kitchens.
Ingredients (Serves 2–4):
- 2 chicken breasts or 4 thighs (boneless, skinless)
- Salt and pepper
- ½ cup flour (seasoned lightly)
- 2 eggs, beaten + 1 tbsp cold water
- 1½ cups panko breadcrumbs
- Oil for frying (2–3 cups neutral oil)
Steps:
- Trim & Prep: Pound chicken to even ½-inch thickness between plastic wrap. This ensures uniform cooking.
- Season: Sprinkle both sides with salt and pepper—gentle massage helps absorption.
- Dredge: Coat lightly in seasoned flour, tapping off excess.
- Dip in Egg Wash: Thoroughly wet the surface—no dry patches.
- Bread with Panko: Press crumbs gently without crushing.
- Rest the Cutlets (Crucial): Let breaded chicken rest 10–15 minutes. This bonds coating before frying.
- Heat Oil: Bring to 170–175°C (340–350°F). Use chopstick or breadcrumb test—crumb should sink then rise almost immediately.
- Fry (First Pass): 2–3 minutes per side until light golden.
- Rest 1 Minute: Let steam escape (critical to maintain crunch).
- Fry (Second Pass): Another 45–60 seconds for perfect color and crisp shell.
- Drain on Rack: Never paper towels—steam rebounds into crust. Air circulation maintains integrity.
- Slice & Plate: Always cut diagonally; knife friction maintains crumb.
That double-fry method separates home-cooked from restaurant-grade.
Easy Chicken Katsu Recipe You Can Make in 20 Minutes
Pressed for time? Follow my service-line “express protocol”—used for late-night staff meals:
- Slice chicken thinner (¼ inch).
- Skip rest; single fry at 175°C for 2–3 minutes.
- Drain at angle to remove maximum oil.
- Serve with instant cabbage slaw and bottled chicken katsu sauce or tonkatsu sauce (blend of Worcestershire, soy, and mirin).
It’s not identical to the real deal, but efficient enough to feed a cranked-up Friday shift.
The Secret to Crispy, Golden Chicken Katsu Every Time
Ask any veteran chef where most home cooks fail—they’ll point to one detail: oil management.
- Overcrowding the Pan cools oil, resulting in soggy crust. Always fry one or two cutlets at once.
- Temperature Drop Recovery: Return heat before initiating next batch. Professional fryers recover automatically; home cooks need patience.
- Oil Purity: After each session, strain crumbs out—oxidized debris darkens oil and flavor.
Some purists even replace oil after every two uses. Fresh oil = neutral taste = longer crisp retention.
I recall a Tokyo mentor who’d dip his ear over the fryer (dangerous but poetic). He claimed each oil spoke differently—its sizzle tone changed when nearing fatigue. He was right.
Building the Perfect Chicken Katsu Sauce
The role of chicken katsu sauce (also called tonkatsu sauce when used interchangeably) extends beyond garnish—it defines aftertaste velocity. Without it, fried food feels monotonous; with it, every bite resets.
Traditional sauces blend:
- Worcestershire base (acid and savor)
- Ketchup or tomato paste (sweet-tangy bridge)
- Soy sauce (anchoring umami)
- Sugar + vinegar (balance)
- Dash of fruit puree (apple or prune for depth)
Quick DIY Ratio:
- 2 tbsp Worcestershire
- 1 tbsp ketchup
- 1 tsp soy sauce
- ½ tsp sugar or honey
- Optional: grated apple for Japanese authenticity
Simmer 1 minute for emulsification, cool, then drizzle.
Chefs tweak viscosity intentionally: thicker sauces for cutlet dips, thinner reductions when pouring over rice or curry.
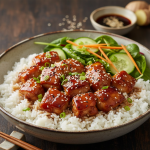
Chicken Katsu Curry: Japan’s Ultimate Comfort Fusion
Ask Japanese salarymen their favorite post-work meal, and many will say chicken katsu curry. It’s the ultimate hybrid—crispy katsu paired with luxuriously spiced curry roux poured over rice.
Why It Works:
- Fat from fried chicken enriches curry texture.
- Sweet-savory sauce contrasts deep fried crunch.
- Combined dish satisfies psychological craving for both “main” and “gravy.”
Industrial kitchen trick: layer rice → a thin layer of curry → katsu → top drizzle. This shields bottom crust from saturation while ensuring flavor distribution.
At my consulting projects for curry chains, we’d time sauce application (no more than 30 seconds before service) to maintain a measurable 40% crust integrity post-delivery. Precision even in indulgence.
Chicken Katsu Ramen: A Contemporary Twist
Modern ramen shops often top bowls with chicken katsu instead of chashu for contrast. The best technique here isn’t dunking; it’s float + dip.
Slice the cutlet, lay halfway on soup edge—one side steams for tenderness, the top remains crisp. That juxtaposition of broth-soaked crunch became a signature at a Los Angeles ramen bar I helped open in 2019.
Not every customer knew the intentional mechanics, but every Instagram photo caught that half-soaked shimmer: edible engineering disguised as comfort food.
Chicken Katsu Around the World
- Hawai‘i: Serves katsu with mac salad and rice, drenched in mayo-based sauces—local adaptation of plate lunch culture.
- Korea: Known as chicken donkatsu, thicker, sometimes smothered in brown gravy. Korean school nostalgia food.
- Western Cafés: Trend of katsu sandwiches (katsu sando) on milk bread exploded thanks to social media; presentation aligns with minimalist aesthetics.
I’ve watched students in California’s culinary schools remix katsu into tacos, sliders, even sushi rolls. Every mutation confirms its global status: a texture that transcends borders.
Professional Tips and Secret Techniques
| Challenge | Industry Fix | Why It Works |
|---|---|---|
| Soggy Crust | Rest on rack + airflow | Prevents back-steaming |
| Greasy Finish | Maintain oil temp between 170–175°C | Ensures steam expulsion rather than absorption |
| Uneven Color | Flip gently once oil movement slows | Corrects thermal gradient |
| Flavor Flatness | Add pinch of garlic powder to flour stage | Boosts umami without overt westernization |
| Dull Sound | Refresh panko (dry toast before use) | Removes absorbed humidity common in ambient storage |
Professional fryers also “fall away” the breaded cutlet—dipping the lower quarter into oil for 2 seconds before release. This flash-seals coating, preventing detachment bubbles.
The Restaurant Workflow Behind Perfect Katsu
In high-output kitchens, consistency beats creativity. Each batch follows rigid protocol:
- Meat tenderization using gravity presses or manual pounding.
- Par-breading stations labeled flour→egg→panko left to right for ergonomic flow.
- Cold resting trays (4°C for 10–15 min) to set crust before fry.
- Batch Fry & Hold: Pre-fry to 80% doneness, then final fry upon order for real-time crispness.
This two-stage system lets restaurants deliver “made-to-order” texture within two minutes—a vital operational secret behind franchises that maintain crunch even during rush hours.
Nutrition Snapshot (Per 150 g cutlet)
| Element | Average Value |
|---|---|
| Calories | ~400–450 |
| Protein | 25–30 g |
| Fat | 15–20 g |
| Carbs | 30–35 g |
| Sodium | Moderate (varies by seasoning) |
For lighter variants, some modern chefs oven‑bake or air‑fry breaded chicken at 200°C for 15 minutes, flipping halfway. Results reach 80% of deep-fried crispness, perfect for home meal prep—though purists may call it culinary heresy.
Chicken Katsu Near Me: Understanding the Global Scene
Search “chicken katsu near me” in any major city, and you’ll uncover the globalization of Japanese comfort. But not all katsu is created equal.
Evaluate authenticity by these details:
- Panko texture: irregular, pale-golden, never dark brown.
- Sauce thickness: pourable, not ketchup-heavy paste.
- Cabbage cut: ultra-fine chiffonade, almost cloudlike.
- Meat thickness: uniform, no jagged pounding marks.
In Singapore or Dubai, you might pay triple the Japanese price—but the benchmark remains the same: light crunch, balanced fat, clean finish. The true lineage of katsu follows craftsmanship, not geography.
Personal Reflection: Lessons from a Thousand Cutlets
After nearly a decade in professional kitchens, frying chicken might seem mundane—but cooking chicken katsu still commands respect. The dish embodies Japanese mastery of deliberate simplicity.
Once, during a quiet prep shift in Kyoto, an elderly chef watched me drain a cutlet and whispered, “Let the oil speak before the knife.” I didn’t understand then. Now, I do: great katsu carries its own music. The subtle hiss as it cools signals balanced moisture—a tiny orchestra between oil and air.
That’s the invisible artistry casual diners sense but can’t name.
Final Thoughts: Why Chicken Katsu Endures
Trends rotate—ramen, poke, sushi burritos—but chicken katsu remains timeless because it satisfies at every sensory register: crisp, warm, juicy, nostalgic.
It’s global yet grounded, simple yet scientific, comforting yet technically demanding.
Cooking it teaches patience, listening, and respect for temperature—all transferable chef virtues. So next time you bite into that golden crust, know you’re experiencing more than fried chicken. You’re tasting over a century of refinement crystallized in one audible crunch.