That single experience crystallized a mission for me. As a chef, I realized that the quest for the perfect crispy egg roll isn’t about a secret ingredient; it’s a war. A war against moisture. Most recipes fail because they don’t understand this fundamental conflict. They give you a list of ingredients but no battle plan.
After years of working in professional kitchens and perfecting the technique, I can tell you that achieving that perfect, light-as-air, shatteringly crisp roll that stays crisp even as it cools is a technical achievement. This is your battle plan. We’re going to deconstruct the enemy (sogginess), build our weapons (technique), and then execute flawless operations for the deep fryer, the air fryer, and even the oven.
The Anatomy of a Perfect Roll: Deconstructing the Enemy
Before we fight the enemy, we must understand the battlefield. An egg roll is a system of three components, and each one is a potential point of failure for moisture.
- The Wrapper (The Fortress Walls): This is your first line of defense. Not all wrappers are created equal.
- Egg Roll Wrappers: These are typically thicker, doughier, and have a distinct egg flavor. They are sturdy but can be prone to softness because of their density.
- Spring Roll Wrappers: These are the thin, translucent, paper-like wrappers made from flour and water. They are the professional’s choice for ultimate crispiness because they contain very little moisture and fry up light and delicate.
- The Insider’s Choice: For the absolute crispiest result, use the thin, wheat-based spring roll wrappers. They provide a delicate, lace-like crunch that is superior to the thicker, doughier egg roll wrappers.
- The Filling (The Trojan Horse): This is where your enemy hides. A wet filling is the #1 reason for soggy egg rolls.
- The Moisture Culprits: Raw cabbage, carrots, and other vegetables release a tremendous amount of water when cooked. Ground meat also releases water and fat.
- The Counter-Intelligence: You must pre-cook and dehydrate your filling. Sauté your ground meat first to render the fat and brown it for flavor. Then, sauté your shredded vegetables (cabbage, carrots, bean sprouts) just until they wilt. The most critical step is to let this mixture cool completely and then squeeze it. Yes, squeeze it in a cheesecloth or a fine-mesh sieve to press out every last drop of excess moisture. This is non-negotiable for a crisp result.
- The Seal (The Gatekeeper): A poor seal is an open invitation for hot oil to sneak in and steam the roll from the inside out, creating sogginess.
- The Technique: Don’t just use water. Use an egg wash (one egg beaten with a tablespoon of water). Apply it with your finger or a pastry brush only along the final edge of the wrapper. Roll it tightly, like a burrito, tucking in the sides as you go. A tight roll not only prevents oil from seeping in but also helps the filling cook evenly from the inside out.
The Three Pillars of Crispiness: Your Battle Plan
With your army of perfectly prepared components, you now need a strategy for the cooking process. I call this the Three Pillars of Crispiness. Master these, and you will win the war.
| Pillar | The Strategy | The Execution |
|---|---|---|
| 1. The Dry-Out | Eliminate all surface moisture before the roll hits the oil. | Pat your finished, sealed rolls completely dry with paper towels. Let them sit, uncovered, in the fridge for at least 30 minutes. This air-drying step creates a “skin” that helps them fry up crispier. |
| 2. The Thermal Shock | Use high, consistent heat to instantly sear the exterior, creating an impermeable barrier. | Use a deep-fry or candy thermometer. Your oil must be between 350°F and 375°F (175-190°C). Frying in oil that’s too cool will allow the wrapper to absorb oil and become greasy and soft. |
| 3. The Rest | Allow the roll to finish cooking and let residual steam escape without re-condensing. | Fry in small batches to avoid crowding, which lowers the oil temperature. Once golden, transfer the rolls to a wire cooling rack. Never use a paper towel. A rack allows air to circulate underneath, preventing the bottom from getting soggy from trapped steam. |
This is the professional’s framework. It’s not just a recipe; it’s a system designed to achieve a specific textural outcome.
The Blueprints: Executing the Mission
Now that you have the theory, let’s apply it to the specific cooking methods you’re searching for.
Blueprint 1: The Classic Deep Fry (The Gold Standard)
This is the method that delivers the ultimate, unapologetic crunch.
- Prep: Follow the anatomy and pillar steps above. Use a heavy-bottomed pot or Dutch oven. Fill with at least 2 inches of a neutral, high-smoke-point oil (canola, grapeseed).
- The Fry: Heat oil to 365°F. Gently lower 4-5 egg rolls into the oil. Do not crowd the pot. Fry for 4-6 minutes, turning occasionally, until they are a deep golden brown.
- The Double-Fry (Pro Move): For unparalleled, shatteringly crisp skin that holds for hours, use the double-fry method. After the first fry, remove the rolls and let them rest for 10 minutes. Then, increase the oil temperature to 385°F (195°C) and fry them again for just 30-60 seconds until they are a shade darker and incredibly crisp.
- The Finish: Transfer immediately to a wire rack. Let them cool for at least 5 minutes before serving.
Blueprint 2: The Modern Air Fryer (The Healthy Alternative)
This method addresses the popular crispy egg rolls in air fryer search. It will not replicate the exact texture of a deep fry, but it can produce a fantastic result with significantly less oil.
- Prep: Prepare your rolls as described. The key difference here is oil application. Place your dried rolls in a bowl and spray them lightly and evenly with high-smoke-point oil (like avocado oil). Toss to coat. This is essential; without oil, they will just be dry and hard.
- The Cook: Preheat your air fryer to 375°F (190°C). Arrange the rolls in a single layer, making sure they don’t touch. Cook for 10-12 minutes, flipping them halfway through.
- The Finish: They will be golden and firm, with a very crisp exterior. Serve immediately. Note that they will soften faster than deep-fried rolls. This is the best
crispy egg rolls air fryermethod.
Blueprint 3: The Oven Method (The “Crispy-Enough” Bake)
This is for those who want to avoid frying altogether. Let’s be realistic: you will not achieve a deep-fry level of crispiness. But you can get a pleasantly firm, browned exterior. This is the best crispy egg rolls in oven method.
- Prep: Prepare rolls as described. Place them on a wire rack set over a baking sheet. This allows hot air to circulate all around, preventing a soggy bottom.
- The Bake: Preheat your oven to 425°F (220°C). Lightly spray the rolls with oil. Bake for 15-20 minutes, then flip them and spray the other side. Bake for another 10-15 minutes, until they are evenly browned and firm.
- The Finish: Serve immediately from the oven for maximum texture.
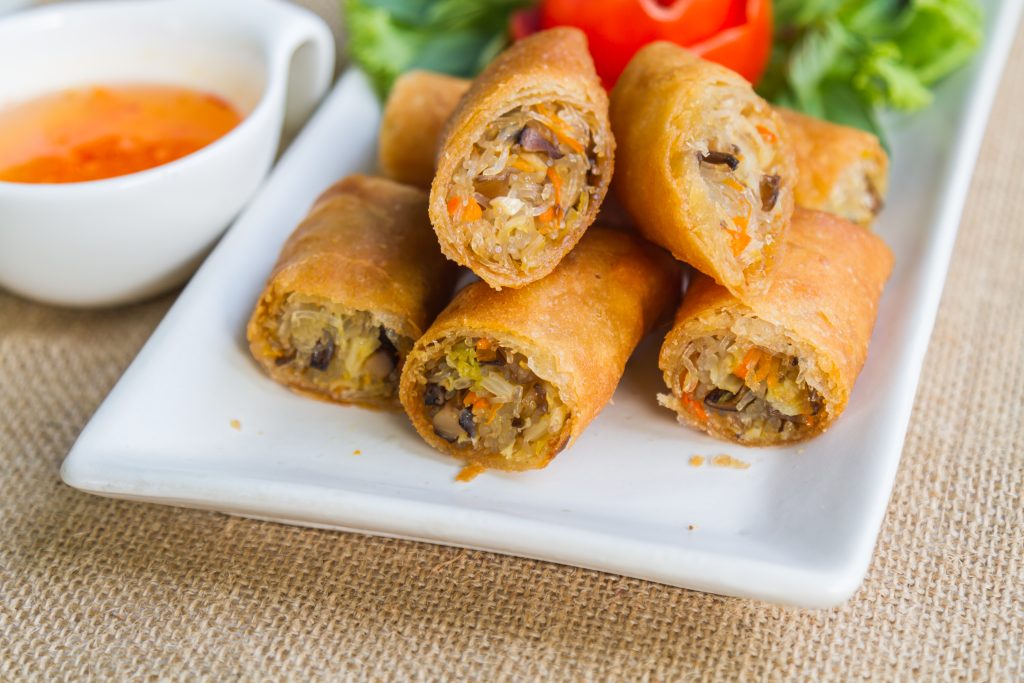
The Global Perspective: A Note on Vietnamese Crispy Egg Rolls
You’ll often see searches for vietnamese crispy egg rolls. While the technique is similar, the filling is what sets them apart. A classic Vietnamese fried spring roll (often called Chả Giò or Nem Rán) typically contains a unique mix of ingredients like:
- Ground pork and shrimp
- Shredded taro or jicama for crunch
- Wood ear mushrooms for a unique, earthy texture
- Glass noodles (miến or cellophane noodles)
- Fish sauce and garlic for seasoning