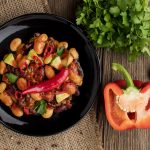
I’ll never forget the smell. It was the scent of rendered pork fat and hickory smoke, thick in the humid air of a North Carolina summer. I was a line cook at a barbecue joint, and my job was the grill. I thought I was good. I could get nice grill marks, I could pull a chop at 145°F. But the owner, a man named Bo who had been pitmaster for forty years, watched me for a service. After the rush, he came over, picked up a chop I’d just cooked, and broke it in half. The inside was perfect, but the fat cap was still tough and rubbery.
“You’re fighting the chop,” he said, his voice a low rumble. “You’re trying to cook the meat and the fat at the same time. They’re two different animals. You gotta learn to manage the heat.” He then showed me how to use the edge of the grill, how to render the fat first, then sear the meat. It was a lesson in thermal management, not just grilling. It changed my entire approach to BBQ pork chops.
For decades, that lesson has been my north star. It taught me that a perfect pork chop is not a recipe; it’s a solution to a thermal puzzle. Most home cooks fail because they treat a chop as a uniform piece of meat. It’s not. It’s a complex system of lean muscle, a fatty cap, and a bone—all of which react to heat differently. This guide is your masterclass in that system. We’re going to move beyond simple recipes and learn the principles that will guarantee you a juicy, smoky, perfectly cooked chop every single time.
The Foundation: Your Chop is Your Destiny
Before we even talk about fire or sauce, we have to win the battle at the butcher counter. This is where 90% of the mistakes are made. The question of the best way to grill pork chops starts with this: what chop are you even grilling?
Let’s be brutally honest. Most supermarket pork chops are terrible for BBQ. They’re too thin, too lean, and often injected with a salt solution that makes them watery and hammy. You cannot create greatness from a flawed foundation.
| Chop Type | BBQ-ability | The Verdict |
|---|---|---|
| Thick-Cut Rib Chop | ⭐⭐⭐⭐⭐⭐ | The Champion. At least 1.5 inches thick. The bone is a heat shield, and the thick fat cap renders down to baste the meat. Forgiving, flavorful, and the gold standard. |
| Thick-Cut Loin Chop (Center-Cut) | ⭐⭐⭐⭐⭐ | The Contender. The “T-bone” of pork. Two distinct muscles (loin and tenderloin) offer two textures. The bone is a huge plus. Can be slightly less forgiving than a rib chop. |
| Boneless Loin Chop | ⭐⭐ | The Challenge. Lacks the flavor and thermal protection of the bone. Prone to drying out. Requires absolute precision and a good brine. |
| Thin-Cut (< 1 inch) | ⭐ | Avoid for BBQ. This isn’t BBQ; it’s a quick sear. You will create a tough, dry product every time. |
The non-negotiable rule is this: Always choose a thick-cut, bone-in chop. I’m talking at least 1.5 inches. Anything less is a recipe for disaster. This thickness is your thermal buffer. It gives you a large temperature window, allowing you to develop a deep, dark crust on the lean meat without overcooking the interior, while giving the fat cap enough time to render properly. The bone is your best friend. It not only imparts incredible flavor but also acts as an insulator, allowing the meat next to it to cook more gently and evenly.
The Thermal Insurance Policy: Why You Must Brine
Even with the perfect chop, there’s a margin for error. The single best tool to narrow that margin is a brine. I think of a brine as thermal insurance. It gives you a larger safety net, ensuring that even if you overshoot your target temperature by a few degrees, the chop will still be moist.
A brine is a saltwater solution (typically 4 tablespoons of kosher salt and 2 tablespoons of sugar per quart of water). Through osmosis, the muscle fibers absorb this liquid. The salt denatures the proteins, allowing them to trap more water during the cooking process. The result is a chop that is seasoned from the inside out and is significantly more resistant to drying out.
For a truly next-level experience, try a buttermilk brine. The lactic acid in buttermilk works as a gentle tenderizer, and the result is an incredibly tender chop with a subtle, pleasant tang. Simply swap the water for full-fat buttermilk and add the same ratio of salt.
Whichever brine you choose, submerge your chops for at least 1-4 hours. Pat them completely dry with paper towels before they hit the grill. This is a critical step. A wet surface will steam, not sear, and you’ll never get that desirable crust.
The Core Principle: Mastering the Two-Zone Fire
This is the heart of the matter. This is the technique that my pitmaster mentor was trying to teach me. A single-zone fire—where the entire grill is one temperature—is the enemy of the thick-cut pork chop. You need two zones: one for high, direct searing heat, and one for low, indirect cooking heat.
This method allows you to get the best of both worlds: the Maillard reaction and crust of a hot sear, and the gentle, even cooking of an oven.
Setting up your Two-Zone Fire:
- For a Charcoal Grill: Pile all your hot coals on one side of the grill. This creates a hot zone (direct heat) and a cooler zone (indirect heat). Simple and effective.
- For a Gas Grill: Turn on the burners on one half of the grill to medium-high or high. Leave the burners on the other half off. This achieves the same direct/indirect setup.
The Two-Zone Cooking Method:
- Render the Fat (Indirect Heat First): This is the insider secret. Place your chop on the cooler side of the grill first, fat-cap-side up. Close the lid. Let the gentle, convective heat start to slowly render the fat cap. This can take 10-15 minutes. You’re not trying to cook the chop here; you’re just softening the fat.
- Sear (Direct Heat): Now, move the chop to the hot side of the grill. Sear it for 2-3 minutes per side. Don’t touch it. Let it develop a deep, beautiful crust. This is where you get that smoky, grilled flavor.
- Finish (Indirect Heat): Move the seared chop back to the cool side of the grill. Close the lid. Now you’re essentially roasting the chop. The heat will circulate, cooking it gently and evenly from all sides.
- Flip and Finish: After about 5-7 minutes, flip the chop once. Close the lid again. You’re now in the home stretch.
The Million-Dollar Question: The Temperature
This is where fear takes over. People grew up being told pork had to be cooked to a shoe-leather 165°F (74°C). That’s old, outdated advice from an era of trichinophobia. Modern pork production is incredibly safe. The USDA now recommends cooking pork to an internal temperature of 145°F (63°C) followed by a 3-minute rest.
This is your target. 145°F.
At this temperature, the pork will be perfectly cooked, juicy, tender, and safe. It will have a beautiful, rosy pink hue in the middle. If you cook it to 165°F, you will have squeezed out every last drop of moisture. You will have defeated the purpose of the brine and the two-zone fire.
How do you know when you’re at 145°F? You don’t guess. You don’t poke it with your finger. You use an instant-read digital thermometer. This is the single most important tool in your grilling arsenal. Insert it into the thickest part of the chop, making sure not to touch the bone. When it reads 140-142°F, pull it off the grill.
Why pull it early? Because of carryover cooking. The residual heat will continue to cook the chop for another 5-10 degrees as it rests, bringing it right up to the perfect 145°F. This is the secret of every great steakhouse and grill master in the world.
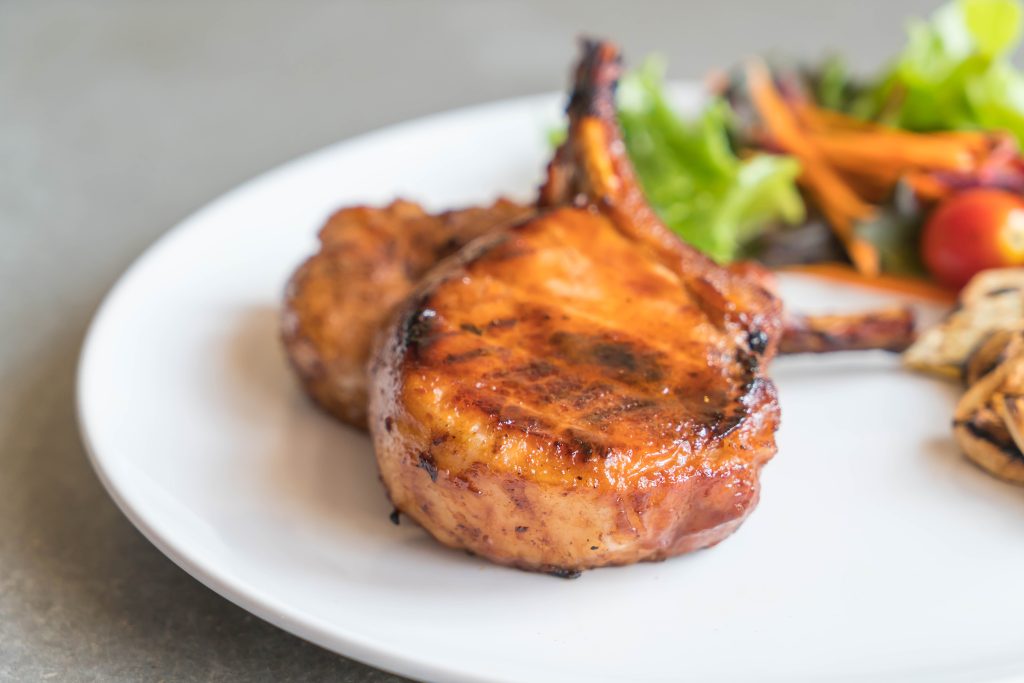
The Final Act: The Sauce is a Glaze, Not a Bath
Now, let’s talk about the bbq pork element. Most people make the mistake of slathering their chop in a thick, sugary BBQ sauce from the beginning. The sugar will burn into a black, bitter mess long before the chop is cooked through. The professional approach is to layer the flavor.
Think in three stages:
- The Dry Rub: This is your foundational seasoning. A simple mix of salt, black pepper, garlic powder, onion powder, and a touch of paprika. Apply it to the dry, brined chop just before it goes on the grill. This creates the initial crust.
- The Mop Sauce (Optional): This is a thin, vinegar-based sauce that you can mop onto the chop during the indirect cooking phase. It adds moisture and a background layer of flavor without burning. A classic
chinese bbq pork recipemight use a master stock with soy and star anise as a mop. - The Final Glaze: This is where you apply your thick, sweet, and sticky BBQ sauce. During the last 2-3 minutes of cooking, brush a generous layer of sauce onto the chop. It will set, become tacky and beautifully caramelized, but it won’t have time to burn.